HOME
Shopping Cart

Sterling Bracelets
Sterling Necklaces
Sterling Brooches
Sterling Buckles
Sterling Earrings
Sterling Rings

Traditional
  Archery
  Round Combs
  Quilt Block Inlay
  Turquoise & Silver

Folklore
Sterling Rings
  Green Man Ring
  Triple Moon Ring
  Spider Ring
  Custom Rune Ring
  Eternal Life Rings
Pewter
  Odin Figurine
  Brigid's Cross
  Porringers

Fairy Tales
Pet Jewelry
Seals & Signets
Special Treasures
  Silver Dining Ware

Custom Cut Stones
Leather and Belts
Custom Design
Your Design
Gallery
Show Everything
Gold Work
Friends of the Forge
Measuring Ring Sizes
About Brigid's Forge
Links
Order
Email

All items handmade in the U.S.A.

Exhibiting Members of the Craftsmen's Guild of Mississippi

You are visitor:

About Us

Custom designer jewelry
by Robert and Debra Shinn


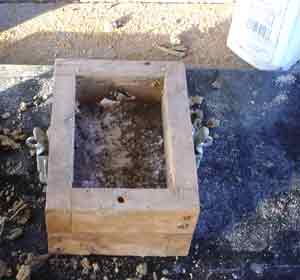
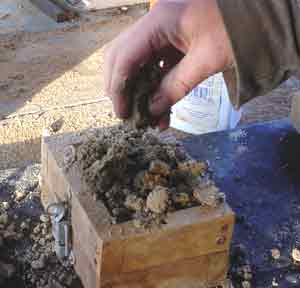
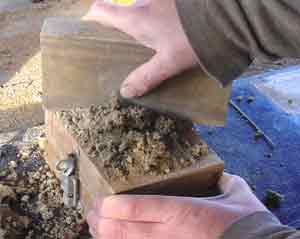
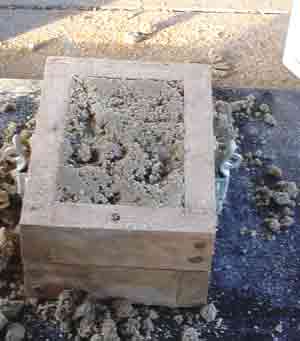
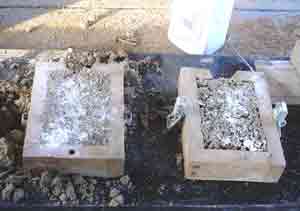
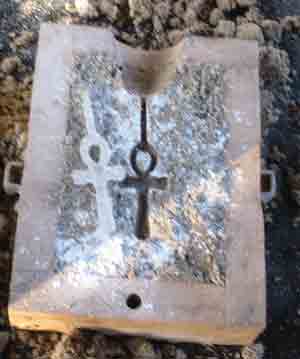
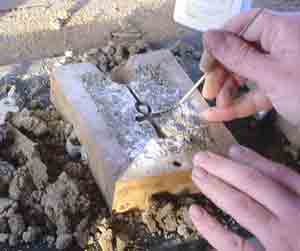
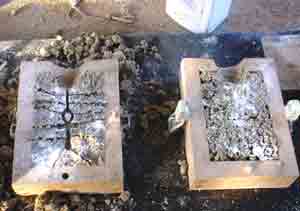
About Brigid's Forge       The Workshop       The Forge       Visit Us
Local Music             Natchez Trace       Nice Places       Family

Sandcast Ankh - continued

Step 7
Fasten the flask together.

Place the cope on top of the drag, using the sides of the draw catches and dowel pin to align. Snap the draw catches closed.
Step 8
Fill the cope.

Sift more sand over the back of the pattern and continue as with the drag until the cope is full. Here you can see the small mound growing. Press sand in firmly.
Step 9
Level the cope.

Pack down the sand in the cope and level it off with your wood block.
Step 10
Packed flask.

Voids do not matter in the case of leveling the cope. It will not be turned over and pressed like the drag was.
Step 11
Open the flask.

Unhook the draw catches and open the flask carefully. The parting powder should allow the cope to come free and the drag to appear as it did when first turned over.
Step 12
Remove the pattern.

Rake out sand near the pour opening to make a sprue hole just above the pattern. Press down and leave a slick surface with no loose grains. Using the end of a tool made from a straight piece of wire with a rounded tip, carefully lift the pattern from the sand. A clean, slick impression should remain. The best place to lift will be the sprue location; do not disturb the sand around the rest of the pattern.
Step 13
Vent the mold.

Again using the wire tool, draw lines from 1/16 to 1/8 inch deep from the impression to the edge of the flask. The water remaining in the sand will be turned to steam by the hot silver and will escape this way. Every projection needs its own vent. Also, use the wire tool to make sure the sprue is clear and connected; if it is less that 1/8" in diameter the silver may not enter the mold correctly.
Step 14
Open cope's sprue.

Using your thumb, rake out sand at the pour opening of the cope; it need not match the drag exactly. Note the placement of vent lines on the drag.
Step 15
Close the flask.

Place the cope back over the drag and fasten the draw catches. Place it pour hole up; make sure no loose grains fall down your sprue hole. Make sure the pattern is out; molten silver comes next!
<< Previous       Next >>

Back to Workshop

Disclaimer: All techniques described are performered by professionals in a professional workshop. These techniques work well for us; we do not warrant them for anyone else. We cannot be responsible for anyone's property, profit, or safety. If you wish to make beautiful objects, pictures and text are no substitute for a good class.